Because Over-Engineering is Underrated
Automotive Mounting Bracket
Sometimes, Spinning Jenny Custom Manufacturing develops products for internal use. Jenny refers to this, metaphorically, as "eating our own dog food." In this case, the wild success of the company led to Jenny getting a new car to ride around in. The car is perfect for her needs, comfortable, with a dashboard she can see over and a window she can hang her head out of, and, best of all, 100% squirrel free. The only thing the car didn't have was a place for the driver to put a cell phone.


This is a new car
(Not Jenny's new car, but a picture of a new car. She's successful, yes, but not that successful.)
PROBLEM STATEMENT
One would think that, as ubiquitous as cell phones are, automobile manufacturers would have built-in holders, integrated into the cockpit design - or at least, given the wide variety of cell phone sizes and styles, an integrated place to clip a holder. They don't though, leaving a place to safely put the driver's cellphone to aftermarket manufacturers. And because aftermarket cell phone holders are designed to hold many different kinds of phone in many different kinds of cars, none of them are really satisfactory. Fortunately, we have the capability to manufacture our own - it's kind of what we do.
AoA: ANALYSIS OF ALTERNATIVES
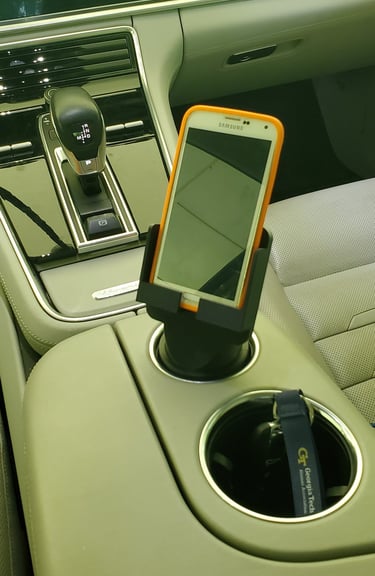
The first decision that had to be made is phone placement. Ideally, the phone would have been in easy sight line of the driver while looking out of the window. Unfortunately, while Jenny's new car is perfect in every other way, there's really no good mount point. up high. The dash is leather, which doesn't give a dash suction cup mount good purchase, and the dash vents are cut back into the dash, giving no good place to clip a holder. Lower down, the center console vents are electrically operated, for no good reason we can determine, so clipping there is right out. And besides, that would obscure the center console screen. A windshield mount would be idea, but windshield suction cup mounts tend to come unstuck during high-G maneuvers - and Jenny just loves herself some high-G maneuvers. So, by default, a cupholder insert was the way to go.
Having decided on a cupholder mount, the next decision was build or buy. The problem with commercial cupholder phone mounts is that they have to be able to fit a number of phones (and phone cases) in a number of cars. That means, inevitably, they wobble and vibrate, either because they don't hold the phone firmly, they fit poorly into the vehicles tapered cupholder, or both.
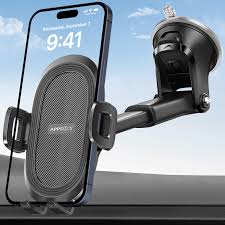

If it were reliable, this would be ideal
SOLUTION DEVELOPMENT
So, a precision designed cupholder mount seemed to be the way to go. Fortunately, we didn't have to start from scratch. This concern had a prebuilt parametric phone cup model we could use as our starting point. Some careful measuring of the phone, the phone case, and the cupholder, led to our first prototype:
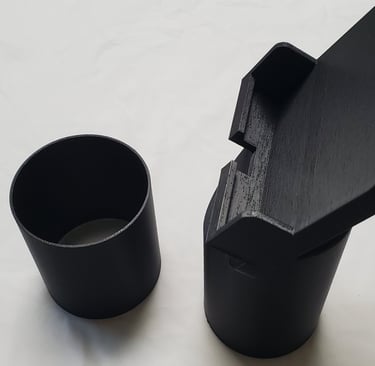
The first protoype indicated we were on the right track, although there were some improvements that needed to be made:
We printed the cupholder cylinder to extend a bit above the top of the cupholder to make room for the USB charging cable. However, the front of the cylinder directly under the cutout for the charger cable bent the USB cable at the connector. This would eventually lead to cable failure - probably at 2am in a broken down car with 1% charge on the phone.
The car's cupholder included fins designed to hold a cup firmly in place (see, high-G maneuvers, above.) That made it almost impossible to spin the phone to face the passenger (particularly for Jenny, since she lacks opposing thumbs.)
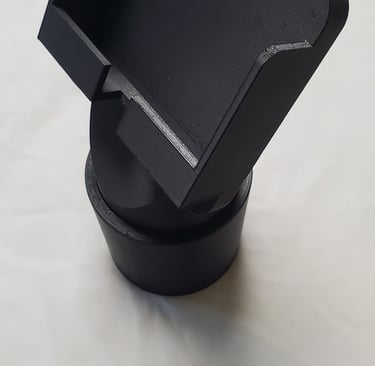
After considering several alternatives, Steve suggested angling the portion of the cylinder that rises above the cupholder, and since the phone only needed to rotate in the XY plane, and after some brainstorming, Jenny recommended having the cupholder cylinder rotate in an outer sleeve as a simpler fix than developing a ball and socket joint. In the time honored tradition of "good engineers borrow, great engineers follow designs into dark alleys , turn them upside down and shake until all the loose change and good design elements have fallen out," we decided to incorporate the useful elements of the original in our own design.
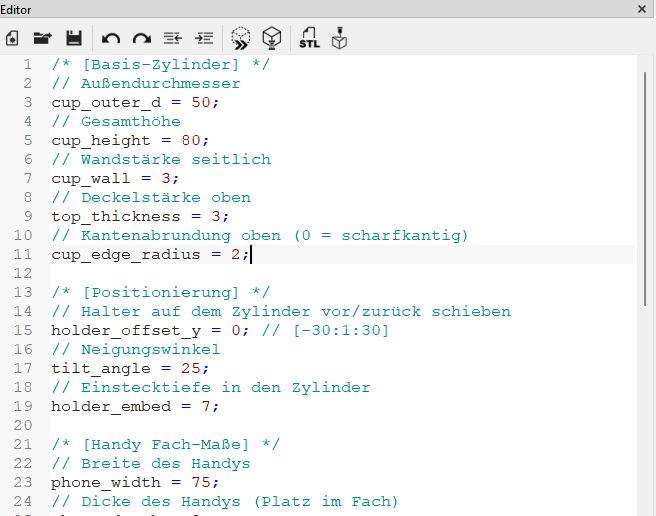
We started with a ground-up rewrite into an entirely new code base (from the design, not from the original code - it was just easier that way.) Steve could handle that the comments were in German, but the geometry was too: elegant, precise, and very hard to understand. Jenny insisted on a fresh approach before any tinkering.
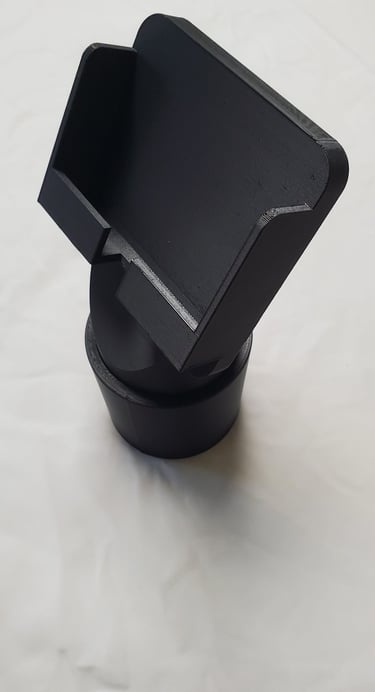
The second prototype successfully overcame both problems Jenny identified in the original design. The angled face left room for the USB connector to sit flat against the holder with no bending or pressure, and the 0.4mm gap between the sleeve's ID and the holder's OD allowed it to rotate freely without wobbling.
During testing and use, two more issues emerged:
There was still some wobble in the base, since the car's cupholder had a slight taper to it.
The phone itself tended to wobble. Even though the holder was sized to the phones exact dimensions, the phone's case was flared at the bottom, to protect the phone from drop impact, which meant that the sides couldn't hold the phone snugly.
(Not Jenny's new car, but a picture of a new car. Successful, yes, but not that successful.)
The original parametric code we borrowed. The good thing is that Steve reads German nearly as well as he reads English
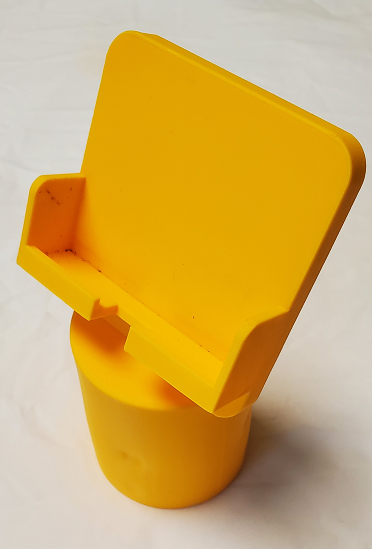
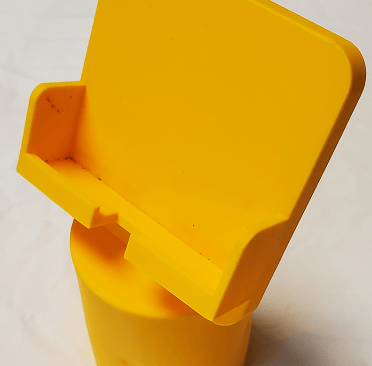
Our Initial prototype printed in yellow PLA. Our rigorous processes require prototypes to be printed in yellow to distinguish them from finished products. (Not really, Steve just had an extra spool of yellow PLA available.)
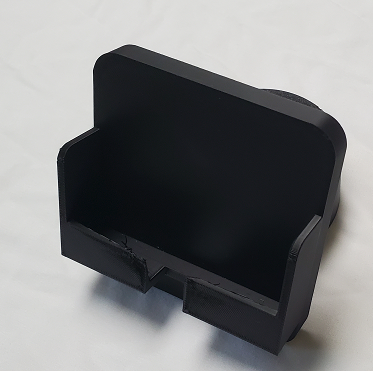
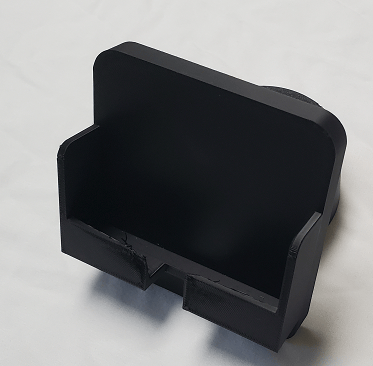
Since we had used the BOSL2 library in the rewrite, we were able to print a tapered cylinder that followed the contour of the car's cupholder. Since we couldn't make the sides tighter and still fit the flared case, we raised the sides and front of the holder, which did a much better job of keeping the phone still.
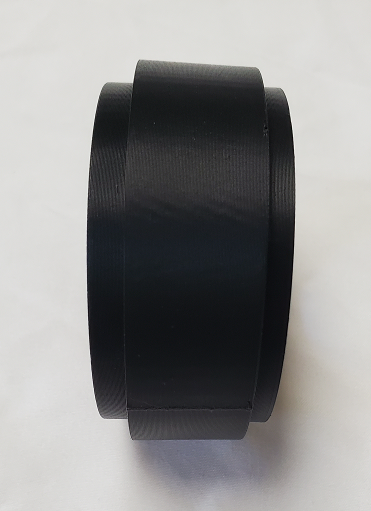
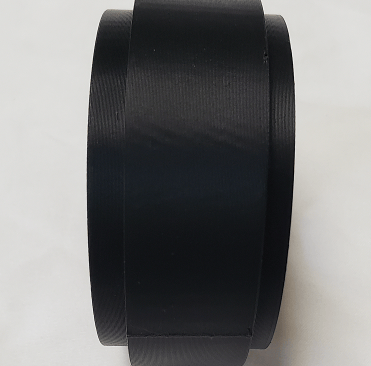
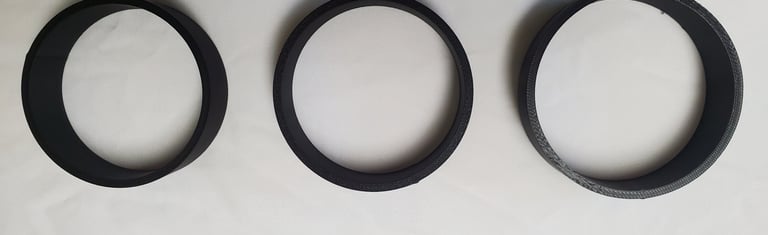
To minimize print time and material waste, we printed a test sleeve (left) to confirm the 0.4mm gap would hold snugly but turn freely, and we printed a test holder (right) to see whether the higher sides and front would interfere with visibility or make it hard to get the phone in and out of the holder.
Iteration 4
Iteration 2
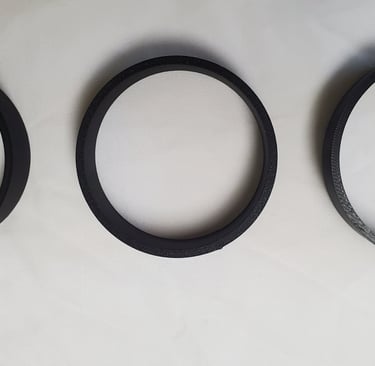
Once we got an appropriately sized tapered holder, the third iteration worked well. Measuring the top opening of the car's cupholder was surprisingly simple, but measuring the bottom accurately proved to be difficult. After toying with using LIDAR or photogrammetry, Steve suggested printing a series of sizing rings, which allowed us to get the bottom dimension with millimeter accuracy (since that's how much difference there was between the sizing ring diameters, obviously.)
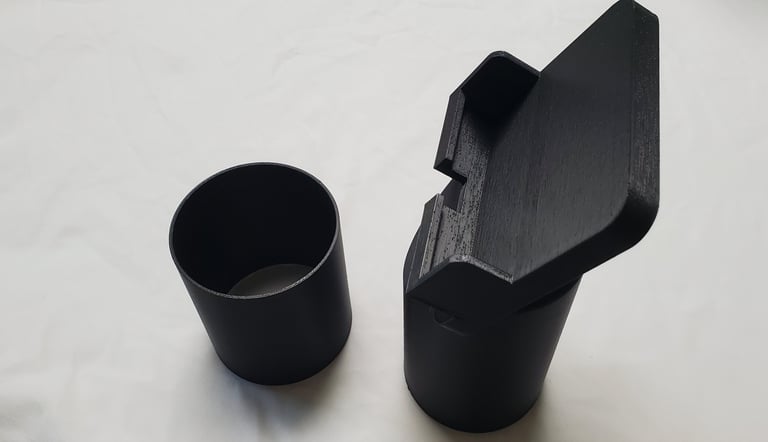
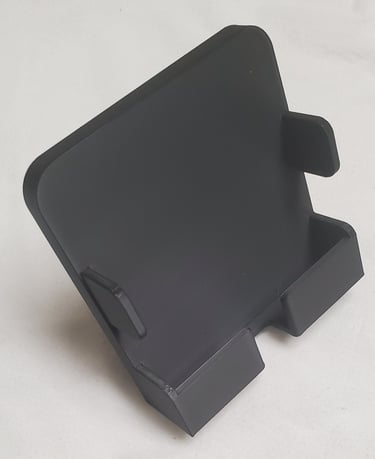
Once we had a satisfactory prototype, the final product was printed using black PETG to match the car's interior fittings (the PETG was for heat resistance - in the South Georgia sunlight, the PLA prototypes didn't last more than a few days without warping.) For precision fit between the two components, we printed them separately. We used a Classic wall generator, and set the walls to print outer to inner. Wall loops were increase to 3, and a 15% infill using a gyroid pattern was used.
Iteration 3
While she was patiently waiting for a squirrel to come down out of a tree, it occurred to Jenny that adding a second set of side walls / wings, higher up and slightly closer in would take care of the last problem - the bit of remaining side-to-side play the phone had. Plus, it would look better. As we were adding that to the design, Steve suggested that we change the approach to the USB cutout to a) optionally round the edges, and b) allow for an asymmetric channel, with different left and right widths to allow it to accommodate side-mounted USB connectors. As soon as our stock of PETG recovers from the South Georgia humidity, we'll print the last iteration and put it into play (filament drying is a two-step process here: First, run a room dehumidifier (over and above the AC) for a day to give the dryer a fighting chance, and only then, actually dry the filament. )
RESULTS
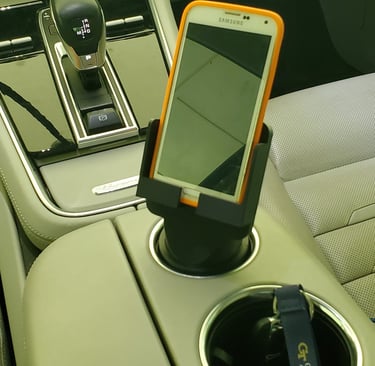
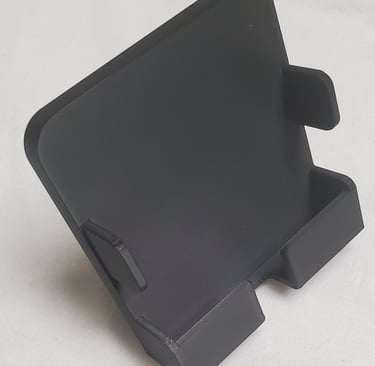
The phone cupholder holder (there's probably a more marketable name for it) works remarkably well. It's easy to get the phone in and out of the holder, the USB cable is easy to connect and doesn't bind anywhere on the holder or the base, and it's easy to rotate but doesn't flop around on its own even under hard acceleration or turning.
We do give up a cupholder, but Jenny has a firm rule about not eating or drinking in the car, anyway.